13 Spring-Approved Short Nail Designs
Published: 12 Sep 2026
Spring is the perfect time to refresh your manicure with lighter colors, playful details, and clean designs that feel effortlessly fresh. Short nails can be just as stylish as longer shapes, offering a practical canvas for everything from delicate florals and soft pastels to modern French tips and subtle patterns. The beauty of these looks is that they are easy to wear while still giving your hands a polished seasonal touch. Explore these 13 spring-approved short nail designs for fresh inspiration that can brighten your look all season long.
Table of Contents
The micro-French
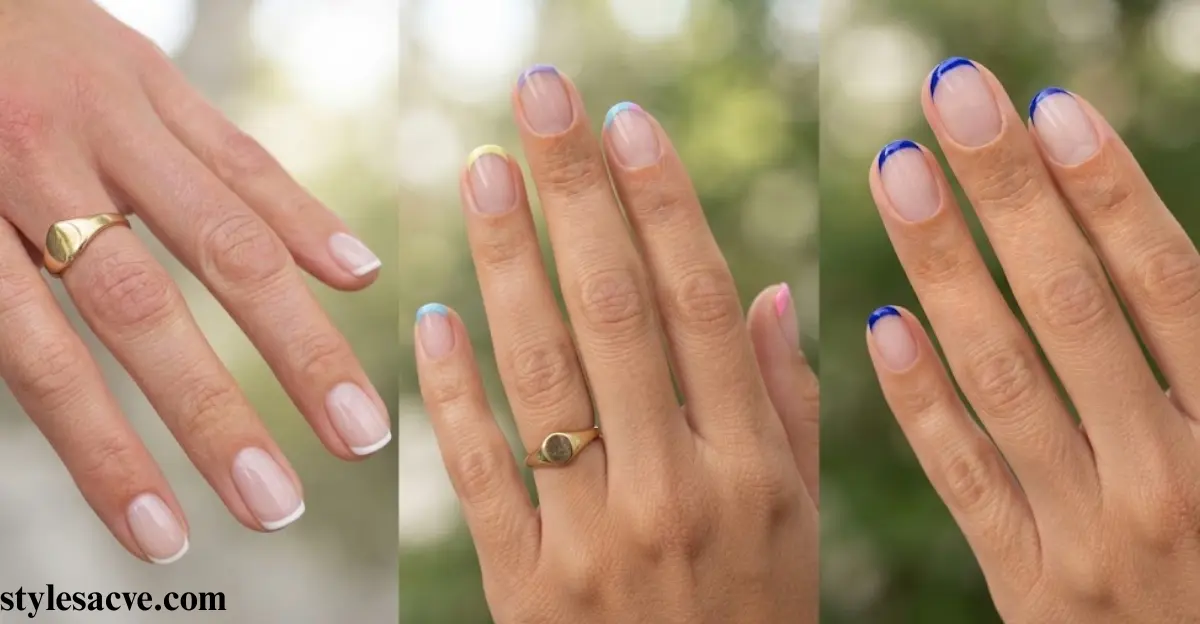
The micro-French is a refined take on the classic French manicure, using a very thin line of paint along the free edge of the nail. Popularized by artists such as Betina Goldstein, this elegant, barely-there style has also been seen on celebrities like Margot Robbie and Anne Hathaway. The delicate finish can visually elongate your natural nails and make shorter nail beds appear longer.
- Micro-French, Thin Line of Paint: The micro-French uses an ultra-thin line of paint for a clean and delicate manicure.
- Free Edge of the Nail, French Manicure: Instead of a wide tip, the color follows the free edge of the nail for a modern French manicure.
- Elongate Your Natural Nails, Longer Nail Beds: Its fine design can visually elongate your natural nails and create the appearance of longer nail beds.
- Reverse Micro-French, Line of Color: A reverse micro-French moves the line of color closer to the cuticles for a subtle variation.
- Cuticles, Elegant, Barely-There: Keeping the detail close to the cuticles or using a very fine tip creates an elegant, barely-there finish.
As a stylist, I love recommending the micro-French when someone wants their nails to look polished without a bold design. I usually keep the line extremely fine and follow the natural shape of the nail, because that small detail makes the manicure look clean, elegant, and surprisingly elongating.
Gem nails
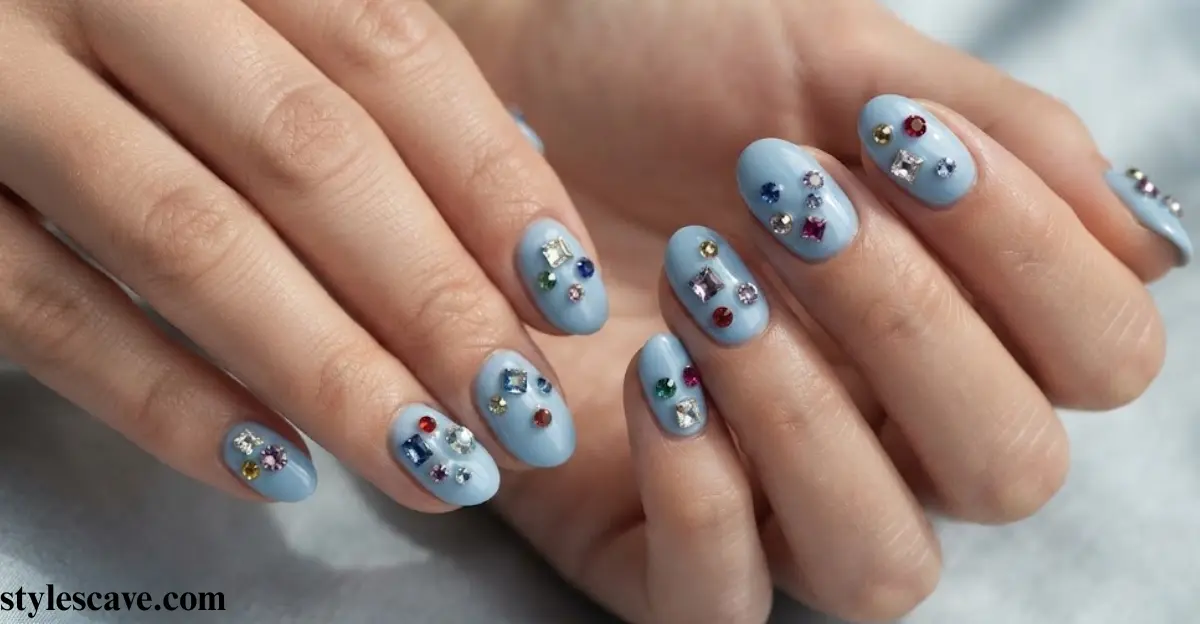
Gem nails are a fun way to add sparkle and personality without needing a complicated design. The look can be bold or minimal depending on the number of gems you use, making it a personalized pop of fun for different styles. Nail artists can place gems directly onto the polish or create a more dimensional effect by using gel and a favorite top coat.
- Gem Nails, Sparkle: Gem nails add noticeable sparkle to the manicure while allowing you to control how subtle or dramatic the finished look becomes.
- Personalized Pop of Fun, Bold, Minimal: You can create a personalized pop of fun with a few delicate gems or choose a bold arrangement for more impact.
- Gems, Stick: Small gems can stick neatly to the nail when applied carefully over the appropriate base.
- Drop of Gel, Polish Encapsulating: A small drop of gel can help secure gems while polish can be layered around them or used when creating an encapsulating effect.
- Favorite Top Coat Layers: Finish with your favorite top coat, applying thin layers carefully so the gems remain secure while the manicure keeps its shine.
When I create gem nails, I usually start with one accent nail instead of decorating every nail immediately. I place a few small gems near the cuticle or center of the nail, then check the overall balance before adding more. This gives me that sparkle without making the manicure feel too busy.
Lunula art Nails
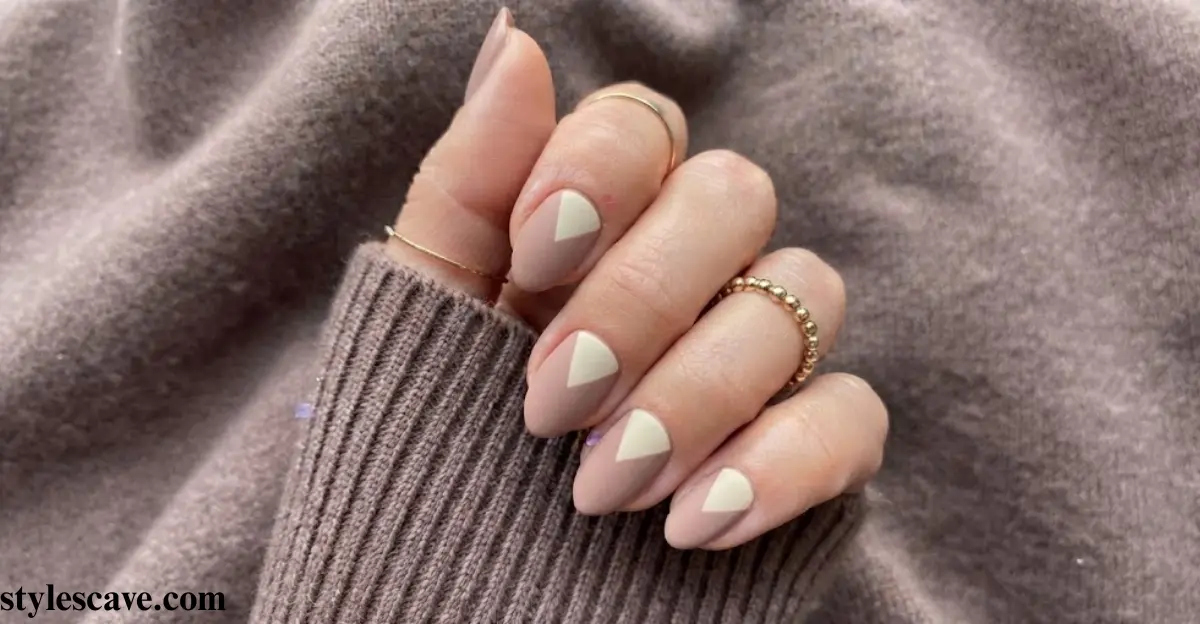
Lunula art focuses on the visible white half-moon area near the base of every nail and turns this natural feature into the main part of the design. It works especially well with shorter nail designs because it does not need extra length to look attractive. Outlining the lunula or filling it in with colorful polish, natural color, reflective glitters or pastel shades can create a clean and creative manicure.
- Lunula, Visible White Half-Moon Area: The lunula is the visible white half-moon area near the base of the nail and provides a natural shape to build the design around.
- Shorter Nail Designs, Short Nails: Lunula art works beautifully with shorter nail designs and can make short nails look more intentionally styled.
- Outlining the Lunula, Filling It In: You can keep the design delicate by outlining the lunula or make it more noticeable by filling it in completely.
- Colorful Polish, Natural Color: A colorful polish creates a playful contrast, while a natural color keeps the manicure soft and understated.
- Reflective Glitters, Pastel Shades: Reflective glitters can make the lunula stand out, while pastel shades give the design a softer and more feminine appearance.
Personal Experience: I tried lunula art when I wanted something different from a traditional French manicure, and I liked how little length was needed to make it work. I usually choose a pastel shade and carefully follow the natural half-moon shape. On shorter nails, that small detail makes the manicure look surprisingly polished and intentional.
Fisherman core nails
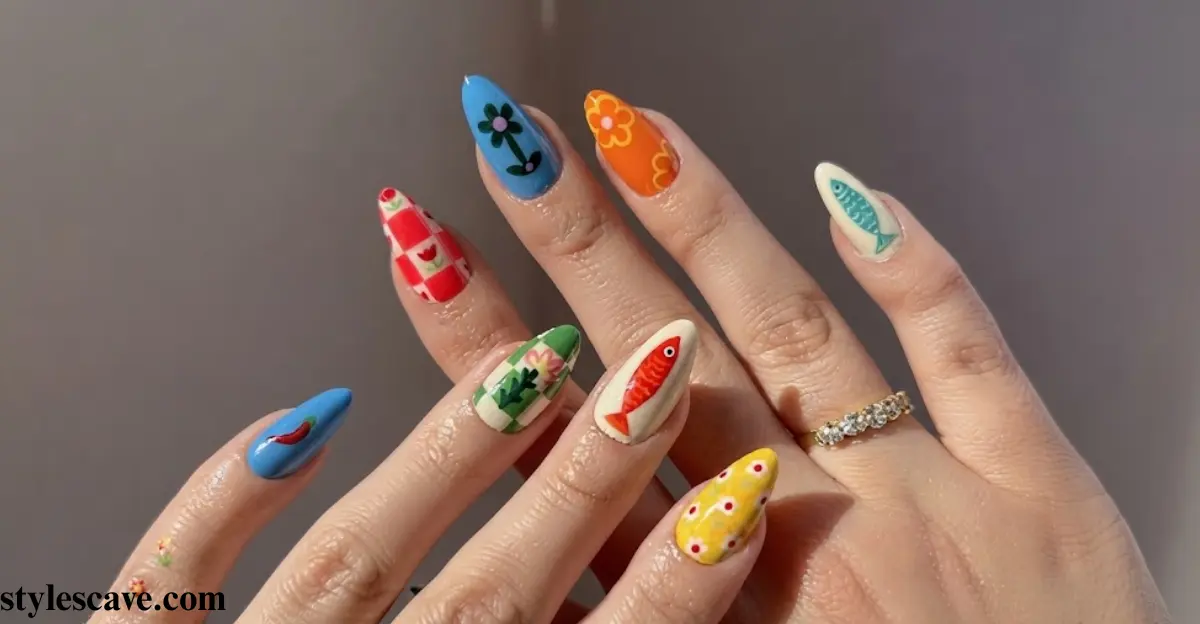
Fisherman core nails bring a playful seaside feeling to the manicure, especially when you want something different from traditional floral or abstract designs. They work beautifully on shorter nails, where delicate artwork can make the natural nail look detailed without needing extra length. For spring fish-inspired designs offer a surprising source of inspiration from tiny realistic fish to colorful scales and shimmering ocean-like details.
- Shorter Nails, Delicate Artwork: Shorter nails provide a compact canvas for delicate artwork, allowing tiny fish and detailed ocean-inspired elements to stand out without overwhelming the manicure.
- Spring, Surprising Inspiration, Fish: Spring can bring surprising inspiration for nail art, and fish designs add a fresh, playful theme that feels different from common seasonal patterns.
- Hang Nguyen, Hang Edit, Fishy Designs: Nail artist Hang Nguyen and her Hang Edit style show how fishy designs can turn a simple manicure into an artistic statement with carefully placed details.
- Fish Shape, Natural Nail: A small fish shape can be drawn directly onto the natural nail, following its surface while keeping the design recognizable and easy to appreciate.
- Magnetic Polish, Chrome, Iridescent Shiny Scales, Realistic Fish: Magnetic polish and chrome details can create iridescent shiny scales, while fine brushwork can make the fish look more realistic and dimensional.
When I want to create a fisherman-inspired manicure, I usually begin with one detailed fish on an accent nail rather than covering every nail with artwork. I add a little chrome or magnetic polish around the design to create a watery effect. It gives the manicure a creative spring feeling while still keeping the shorter nails wearable.
Evil Eyes
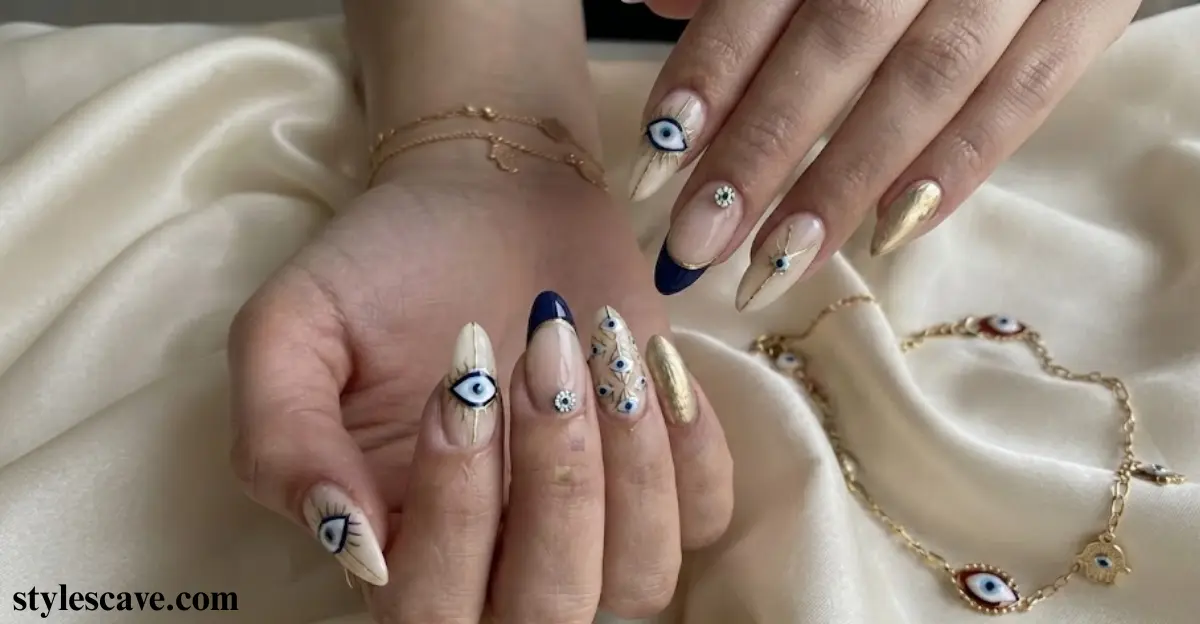
Evil Eyes are a simple micro design with a distinctive meaning, often believed to protect against negative energy. Because the design is made from small circles and carefully placed details, it can be recreated at home without requiring advanced nail-art skills. Using dotting tools in varying sizes makes it easier to create the eye shape and keep each nail slightly different while maintaining the same overall theme.
- Evil Eyes, Micro Design: Evil Eyes work well as a micro design because their basic shape can be created with only a few carefully placed dots and lines.
- Protect, Negative Energy: The design is traditionally associated with protection from negative energy, which gives the manicure a meaningful element beyond its visual appeal.
- Recreate at Home, Dotting Tools: You can recreate the look at home with simple dotting tools, making it accessible even if you are still learning nail art.
- Varying Sizes: Using varying sizes for the circles and pupils can create more dimension and prevent every Evil Eye from looking exactly the same.
- Each Layer, Dry, Next: Let each layer dry before adding the next detail so the colors remain clean and the small design does not smudge.
I find Evil Eyes especially easy to build when I work from the largest circle toward the smallest detail. I let each layer dry completely before moving on, which gives me much better control over the tiny shapes. For me the final manicure feels both playful and slightly mysterious without needing a complicated pattern.
Polka Dots Nails
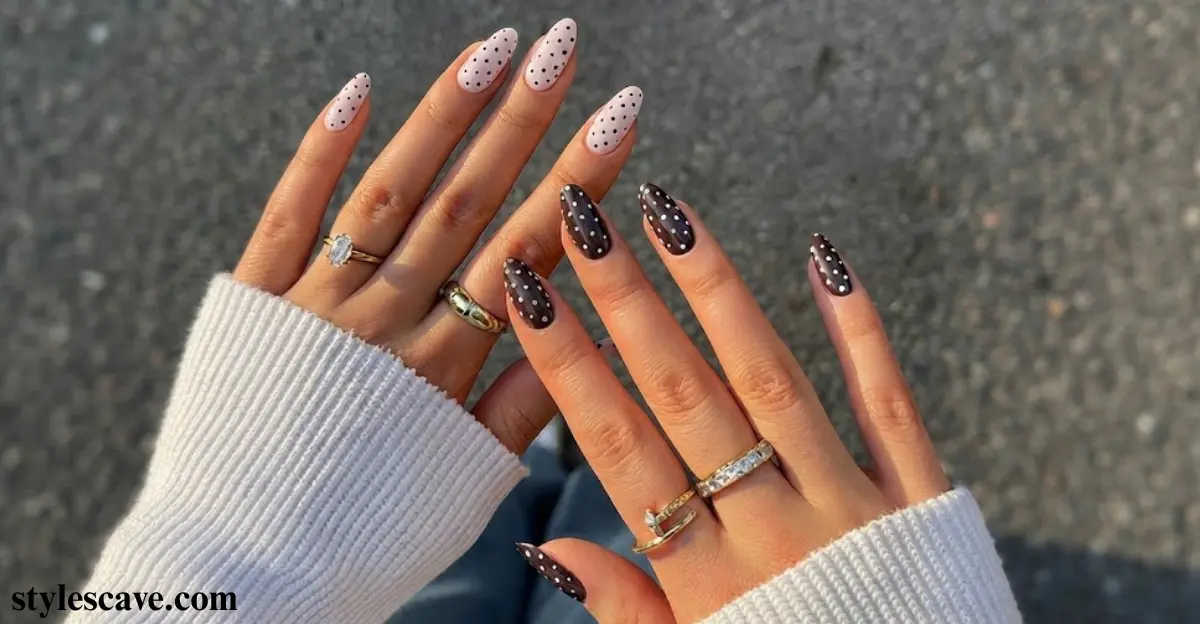
Polka Dots have remained popular because they are simple, recognizable and easy to customize. After their popularity last summer, polka dot manicures continue their reign as a people’s print of choice, proving that this timeless design can keep returning in fresh ways. It is also DIY-friendly, so you can experiment with your favorite colors of polish without needing professional nail-art equipment.
- Polka Dot Manicures, Popularity: The popularity of polka dot manicures comes from their simple pattern and the many ways you can change the colors, size, and placement.
- Last Summer Continuing Their Reign: After being especially popular last summer, polka dots are continuing their reign as an easy pattern for both casual and more polished manicures.
- People’s Print-of-Choice, Timeless Design: Their simple circular pattern has become a people’s print-of-choice because it is a timeless design that works across different nail styles.
- DIY-Friendly, Favorite Colors of Polish: Polka dots are DIY-friendly, allowing you to combine your favorite colors of polish and create a manicure that feels personal.
- Small Dotting Tool, Toothpick: A small dotting tool gives you more control over the size of each dot, while a toothpick can work as a simple alternative for creating smaller details.
When I do polka dots at home, I like choosing two or three colors that work well together before I start painting. I use a small dotting tool for larger circles and switch to a toothpick when I want tiny dots. Changing the spacing between each dot keeps the design from looking too uniform and gives the finished manicure a more playful feel.
Mix and match nails
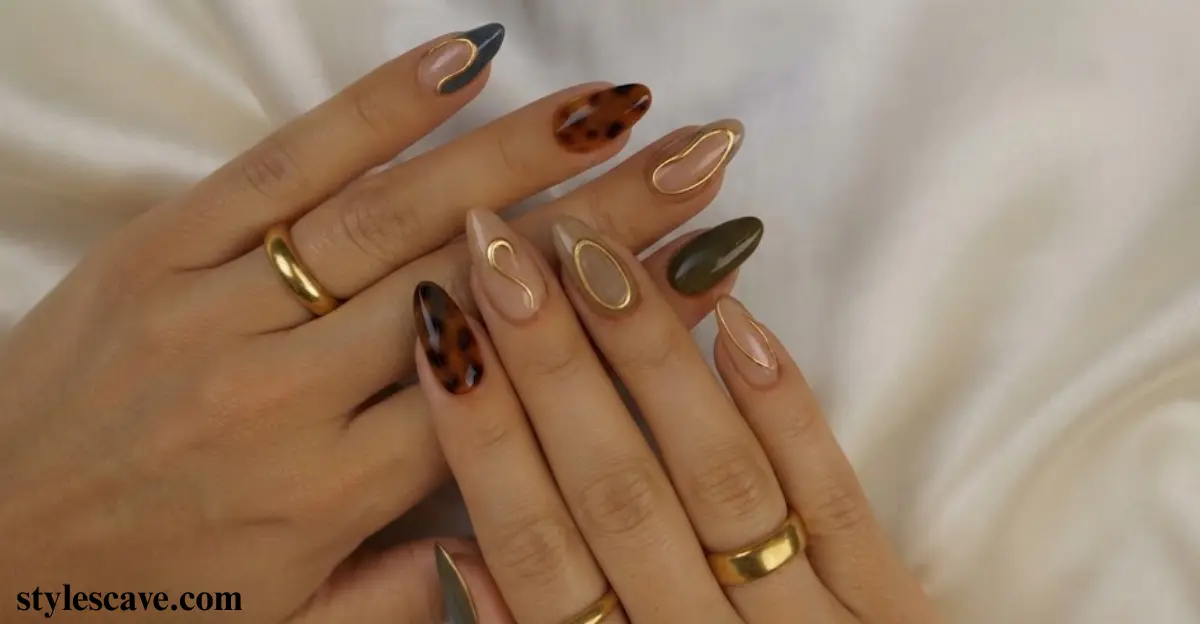
Mixing block colors with detailed designs is an easy way to create a manicure that feels both modern and chic. You get the best of both worlds by keeping some nails simple while giving others more artistic detail.
Start with one color as the base, then build your chosen theme around it. You can incorporate designs on selected nails and add a contrasting color to make the manicure stand out without making the overall look feel too busy.
- Pairing block colors with detailed designs creates a balanced manicure where simple nails give the artwork room to stand out. This works especially well when the designs have several small details.
- This style gives you the best of both worlds by combining a polished, chic finish with creative nail art. The simpler nails keep the manicure wearable while the detailed ones add personality.
- Choosing one color as your base helps connect different designs across the manicure. A consistent base shade makes even contrasting patterns look intentional and keeps the finished set visually cohesive.
- Pick a clear theme before you start and incorporate designs that support it rather than placing random artwork on every nail. Florals, abstract shapes, stars, or tiny graphics can all work around one central idea.
- Adding a contrasting color is a simple way to make certain details pop. Use it for outlines, small accents, French tips, or individual blocks of color so the manicure has dimension without becoming overwhelming.
When creating mixed nail sets, I like deciding which nails should stay clean before adding any artwork. Keeping two or three nails simple usually makes the detailed designs look much more intentional and professionally balanced.
Micro fruit nails
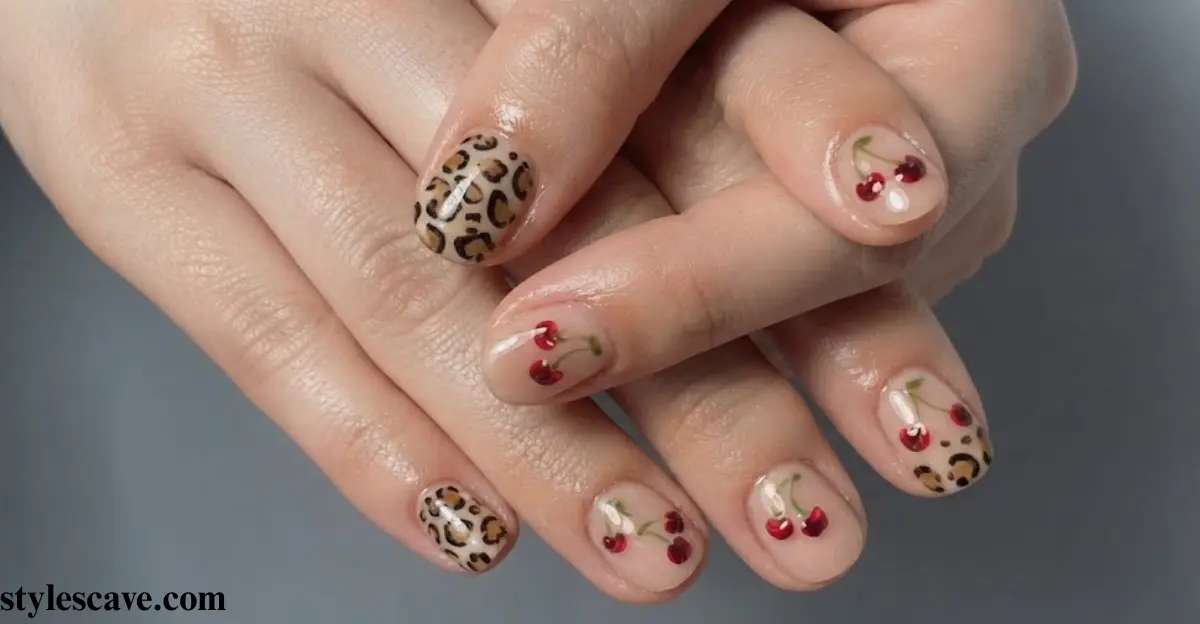
Tiny strawberries, cherries, and lemons can turn a simple manicure into something playful without taking over the entire look. Micro fruit art has a delicate quality that makes the design feel fresh, especially when the fruit details are kept small and clean.
The trend has started to resurge after gaining attention last summer, bringing back its popularity for spring manicures. For an understated look, place the tiny fruit over a neutral shade or soft base color so the artwork feels subtle rather than overly colorful.
- Strawberries, cherries, and lemons are some of the easiest fruits to turn into tiny nail-art details. Their recognizable shapes and colors make them instantly noticeable even when painted in a very small size.
- Micro fruit art is a playful option for anyone who wants something different from traditional floral or French designs. Keeping the artwork miniature gives the manicure a trending feel while still making it easy to wear.
- After appearing frequently last summer, fruit-inspired nails can resurge as a seasonal favorite. Bringing the idea back with smaller illustrations and cleaner placement gives the trend a fresher, more modern finish.
- The popularity of tiny fruit designs works particularly well in spring, when lighter colors and playful nail details become more appealing. Small fruit accents can add a cheerful seasonal touch without requiring a complicated manicure.
- For an understated look, choose a neutral shade as the base color and add just a few tiny fruit illustrations. Beige soft pink or pale nude tones allow the fruit artwork to remain the main accent.
Personal experience: I tried tiny fruit details over a soft nude base when I wanted a playful manicure that still looked polished. Keeping the artwork limited to a few nails made the whole set feel fresh instead of overly decorative.
Japanese “Blooming” Gel
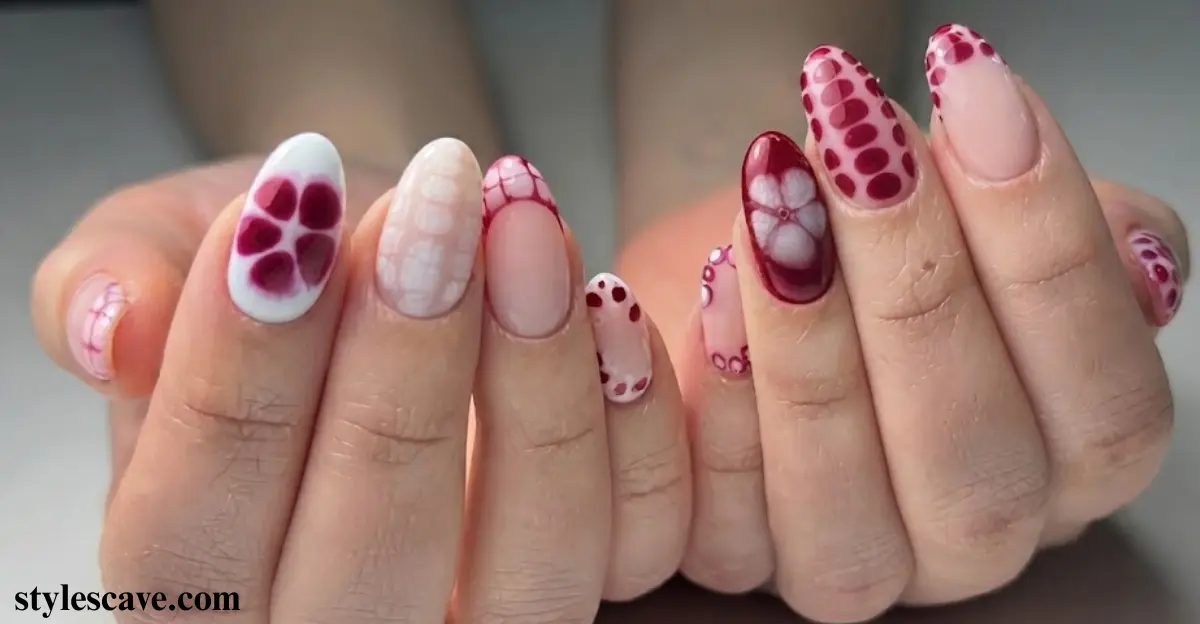
A classic manicure can become much more artistic when every line and detail feels intentionally placed. Japanese-inspired nail art uses delicate movement and carefully balanced details to create designs that look refined rather than overly complicated.
Blooming gel, each layer of pigment spreads organically, creating soft, fluid effects that almost look like the design is moving across the nail. Natalia Mercedes of Sad Girl Nails Studio has helped showcase how this technique can make each nail feel more alive and expressive.
- Start with a clean classic manicure, then treat every line and detail as part of the overall composition. Small details become more noticeable when the base is neat and carefully finished.
- The beauty of this technique comes from details that are intentionally placed to create a sense of movement. Instead of making every nail identical, flowing shapes can give the manicure a softer artistic quality.
- Blooming gel works beautifully with small amounts of pigment, allowing colors to spread naturally through the wet layer. This makes it possible to create delicate floral, abstract, or watercolor-inspired effects.
- As the pigment spreads organically, it creates soft, fluid effects that are difficult to achieve with ordinary polish alone. The result can look naturally blended while still maintaining an intentional nail-art design.
- The work associated with Natalia Mercedes and Sad Girl Nails Studio shows how blooming techniques can make a nail feel alive through movement and subtle color diffusion. Each nail can become a miniature piece of artwork.
When I first worked with blooming gel, I learned that using less pigment gave me a much prettier result. Watching the color slowly spread across the nail helped me create softer designs instead of forcing every detail into place.
Cat-eye Nails
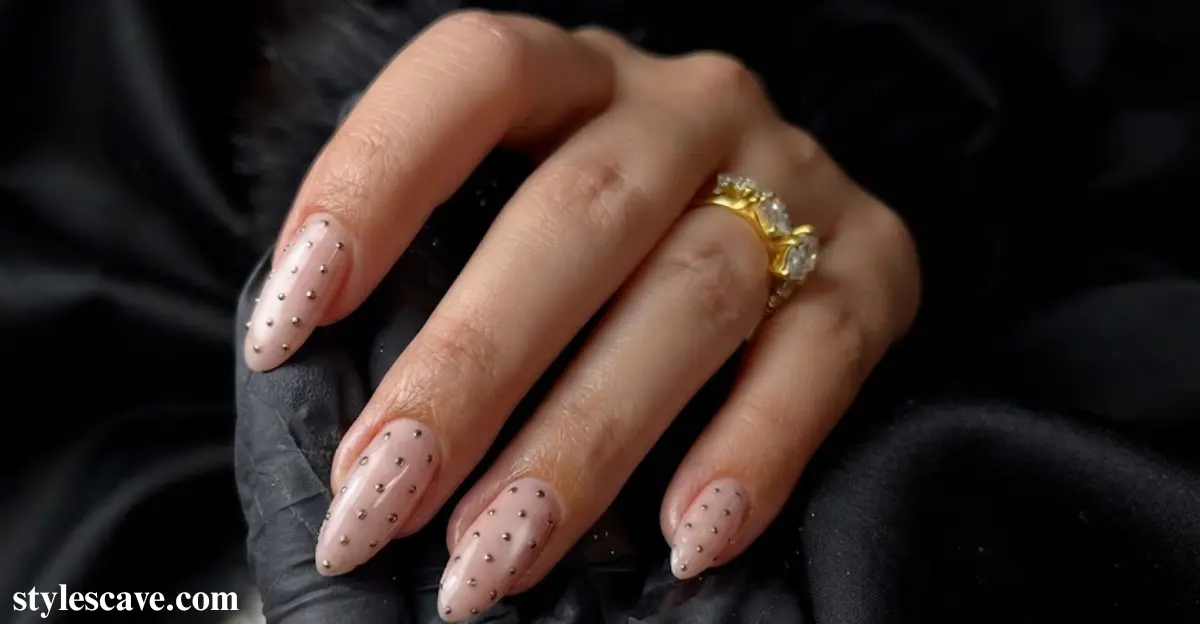
The reflective shimmer of cat-eye manicures makes them especially beautiful when paired with changing seasonal colors. Instead of relying on one traditional shade, you can update the magnetic effect with softer colors that match the mood of the season.
For spring, pastel shades such as pink, lilac, and periwinkle create a fresh finish while allowing the cat-eye effect to remain visible. The combination feels delicate, bright, and modern without losing the signature depth of cat-eye shimmer.
- The defining feature of cat-eye manicures is their shifting shimmer, which changes as the nails catch the light. A magnetic polish can create a concentrated reflective line that gives each nail more dimension.
- Experimenting with seasonal colors keeps the manicure feeling current. Pastel shades work particularly well because their softer tones allow the reflective cat-eye effect to stand out without looking too intense.
- Pink, lilac, and periwinkle are beautiful choices when you want a lighter cat-eye manicure. Each shade gives the magnetic shimmer a different personality while maintaining a soft spring-inspired appearance.
- Combining a reflective finish with lighter colors creates a fresh, seasonal manicure. It is an easy way to make a familiar nail technique feel new without completely changing the style.
- A cat-eye design does not need heavy nail art because the shimmer already provides visual interest. Keeping the rest of the manicure clean allows the reflective effect to become the main feature.
I love checking cat-eye nails under different lighting before finishing the set. The shimmer can look completely different near a window compared with indoor light, so I always move the hands around to make sure the magnetic effect is balanced.
Conclusion
Short nail designs can bring the fresh playful spirit of spring to your manicure while keeping your look practical polished and easy to maintain. What makes these spring-approved styles stand out is the combination of pastel shades floral nail art minimalist details, French tips soft shimmer and seasonal color palettes that work beautifully on shorter nails. From delicate flower accents and cute spring patterns to clean elegant finishes there are plenty of ways to create a stylish manicure without needing extra length. Choosing colors and designs that complement your personal style can make even a simple short nail look feel unique and eye-catching. With the right nail shape thoughtful details and a quality top coat these spring nail ideas can give your fingertips a fresh feminine and beautifully finished appearance all season long.
FAQs
What are the best spring nail designs for short nails?
Floral accents, pastel French tips, soft ombré, tiny patterns, and minimalist designs are excellent choices for short nails. They add seasonal charm without making the nails look crowded.
What nail colors are popular for spring?
Pastel pink, lavender, baby blue, mint green, peach, creamy white, and soft yellow are popular spring-inspired choices. These shades create a light and fresh appearance.
Can short nails look good with detailed designs?
Yes, but smaller and more carefully placed details usually work best. Tiny flowers, dots, lines, and simple French tips can add personality while keeping the manicure balanced.
What is the easiest spring nail design to do at home?
A pastel French manicure, simple dots, or a single floral accent nail can be easy to recreate at home. Using thin brushes or nail stickers can make detailed designs easier.
How can I make short nails look longer?
Vertical details, slim French tips, and nude or sheer shades can create the appearance of longer nails. Keeping the shape neat and the cuticles well maintained also gives a more elongated look.
How long do spring nail designs usually last?
The longevity depends on the products and application, but a well-applied manicure can often remain attractive for around one to two weeks. Using a quality base and top coat can help protect the design and reduce chipping.

7 Makeup Tips for Women in Their 50s, According to Makeup Artists and a Lazy 50+ Beauty Editor





- Be Respectful
- Stay Relevant
- Stay Positive
- True Feedback
- Encourage Discussion
- Avoid Spamming
- No Fake News
- Don't Copy-Paste
- No Personal Attacks
- Be Respectful
- Stay Relevant
- Stay Positive
- True Feedback
- Encourage Discussion
- Avoid Spamming
- No Fake News
- Don't Copy-Paste
- No Personal Attacks
